
Designed a custom USB device for volume and media control, featuring a magnetic quick-release mount for both monitor mounting and desk use.
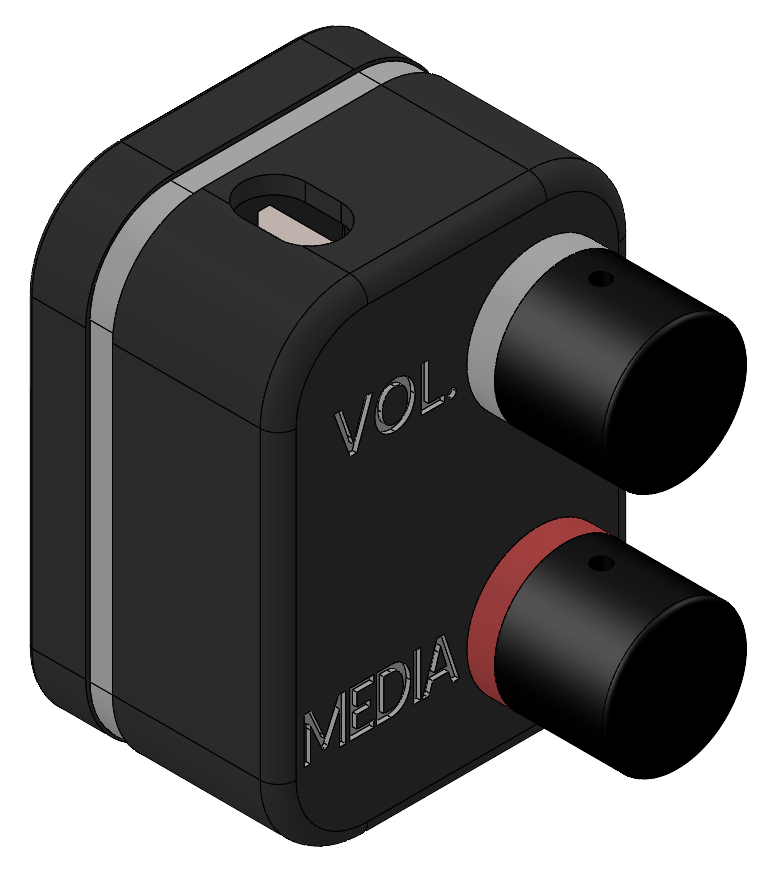
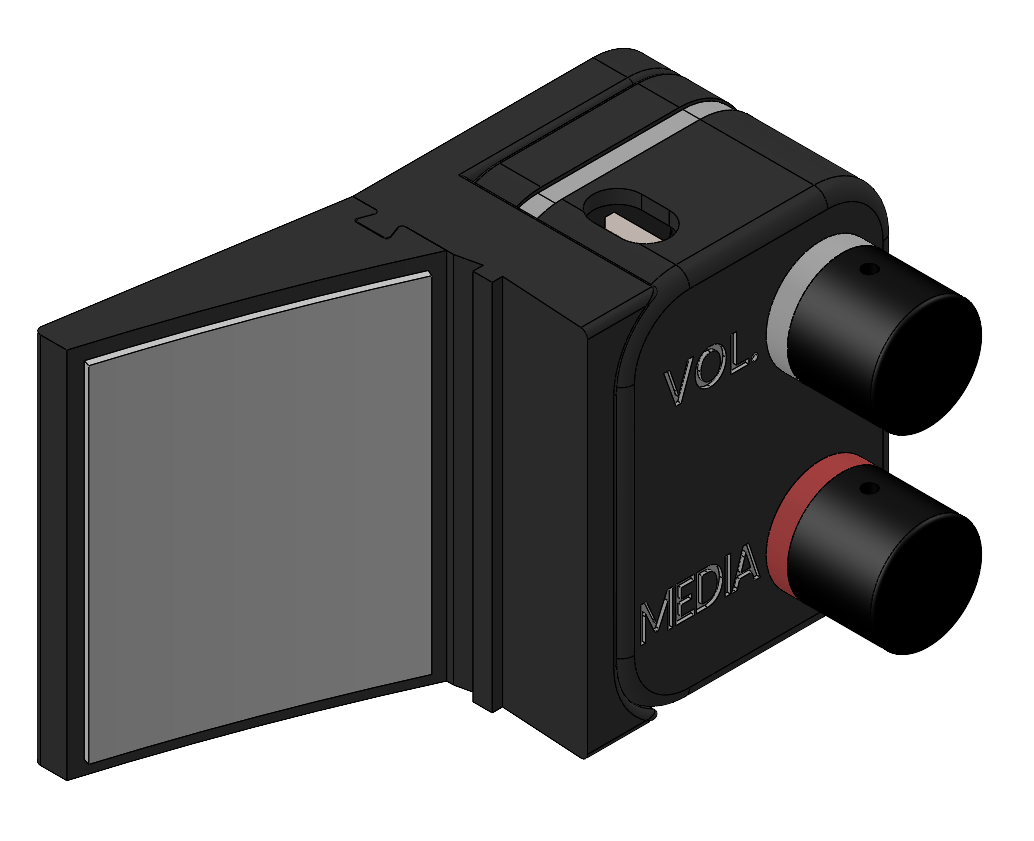
The CAD of the macropad
Summary
As someone who enjoys mechanical keyboards, I’ve come to really enjoy the convenience of a knob to control the volume. However, not all my keyboards have this feature. My goal was to design and manufacture a macropad with a volume control knob so I can have this convenience no matter which keyboard I’m using.
This project also served as an opportunity to gain further experience with electrical components and programming.
Design Challenges
The main challenge when designing this macropad was the small size. I wanted the device to be as small as possible, while still having enough room to fit two rotary encoders, the electronics, and all of the wiring inside.
I also wanted to be able to quickly swap the device from being attached to my monitor, to being used on the desk (in case I wanted to use this with my laptop). However, there isn’t really a good way to attach anything to the monitor because the back is curved and smooth.
Creative Solutions
During the design process, several design decisions were made to work around design constraints. These are some I think are especially unique.
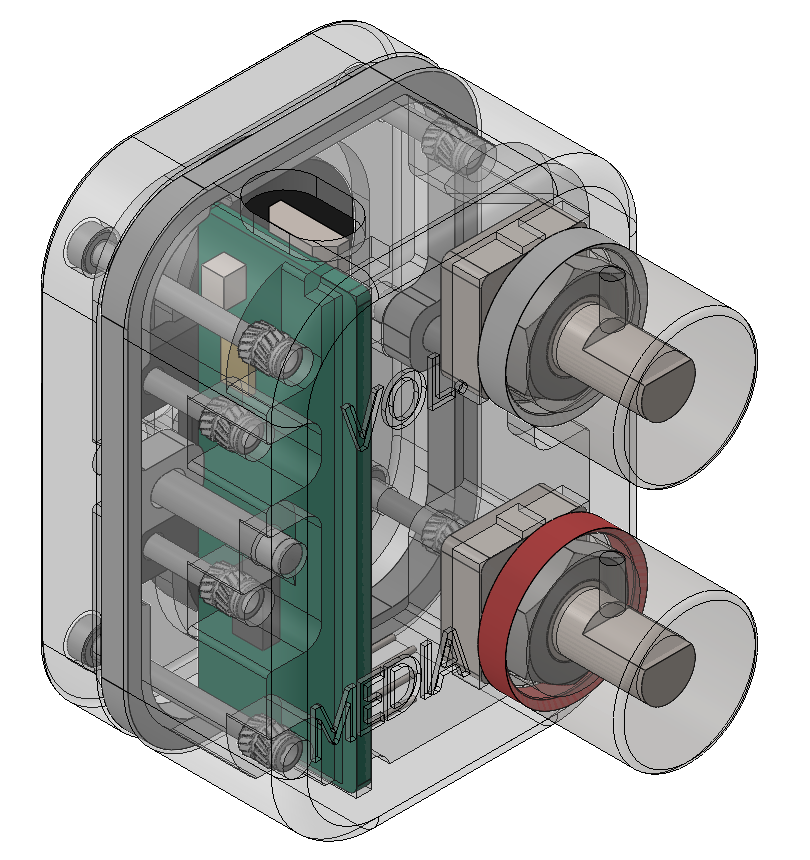
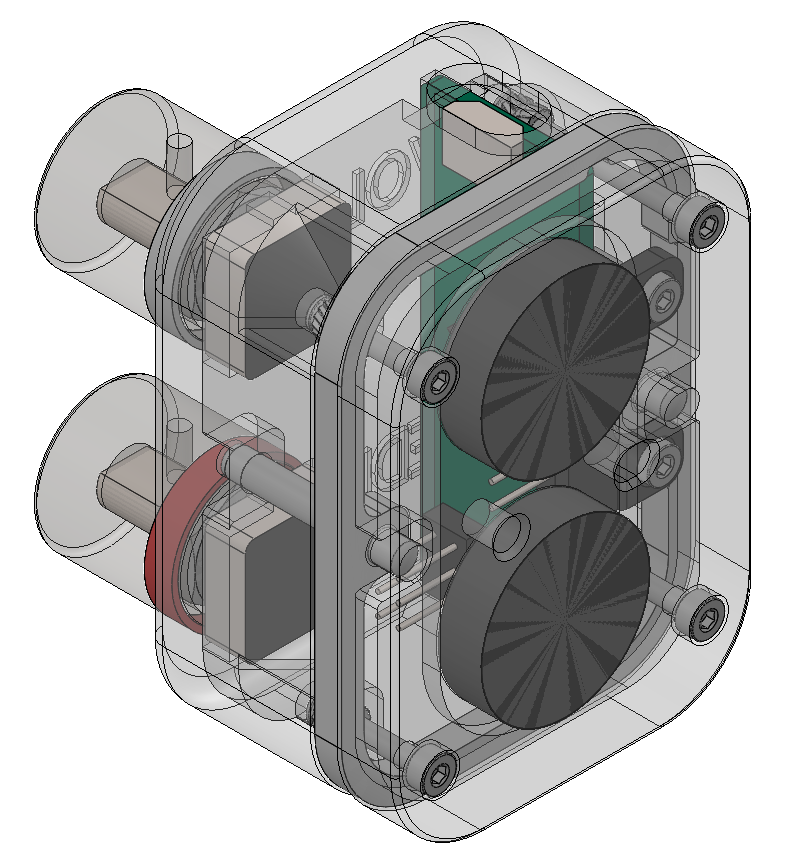
The inner components of the macropad
Dual-purpose magnetic mounting
To quickly swap between monitor and desk modes, I decided to implement large disk magnets into both the bottom of the macropad, and the monitor mounting bracket. These serve a dual purpose, primarily to act as the attachment mechanism in monitor mode, but also to add weight to the device for more stable desk operation.
Exact constraint positioning
There are two instances of exact constraint positioning being used in this design. The first was to align the casing sections and accent ring together, so there wasn’t any shifting when assembling the device.
In addition, small locating pins are used to position the device in monitor mode to align the magnets for the maximum magnetic attraction.
Encoder color coding
I added text to label the function of each encoder. However, to quickly differentiate each encoder at a glance, I decided to add a 3D printed colored ring at the base of each knob. Conveniently, this portion of the knob was inset. So implementing a ring that sits flush with the knob surface was a straightforward decision.
Aesthetic casing design
I added a white accent ring around the casing of the macropad to elegantly conceal the necessary seam between the front and rear housing sections.
Approach
Mechanical Design
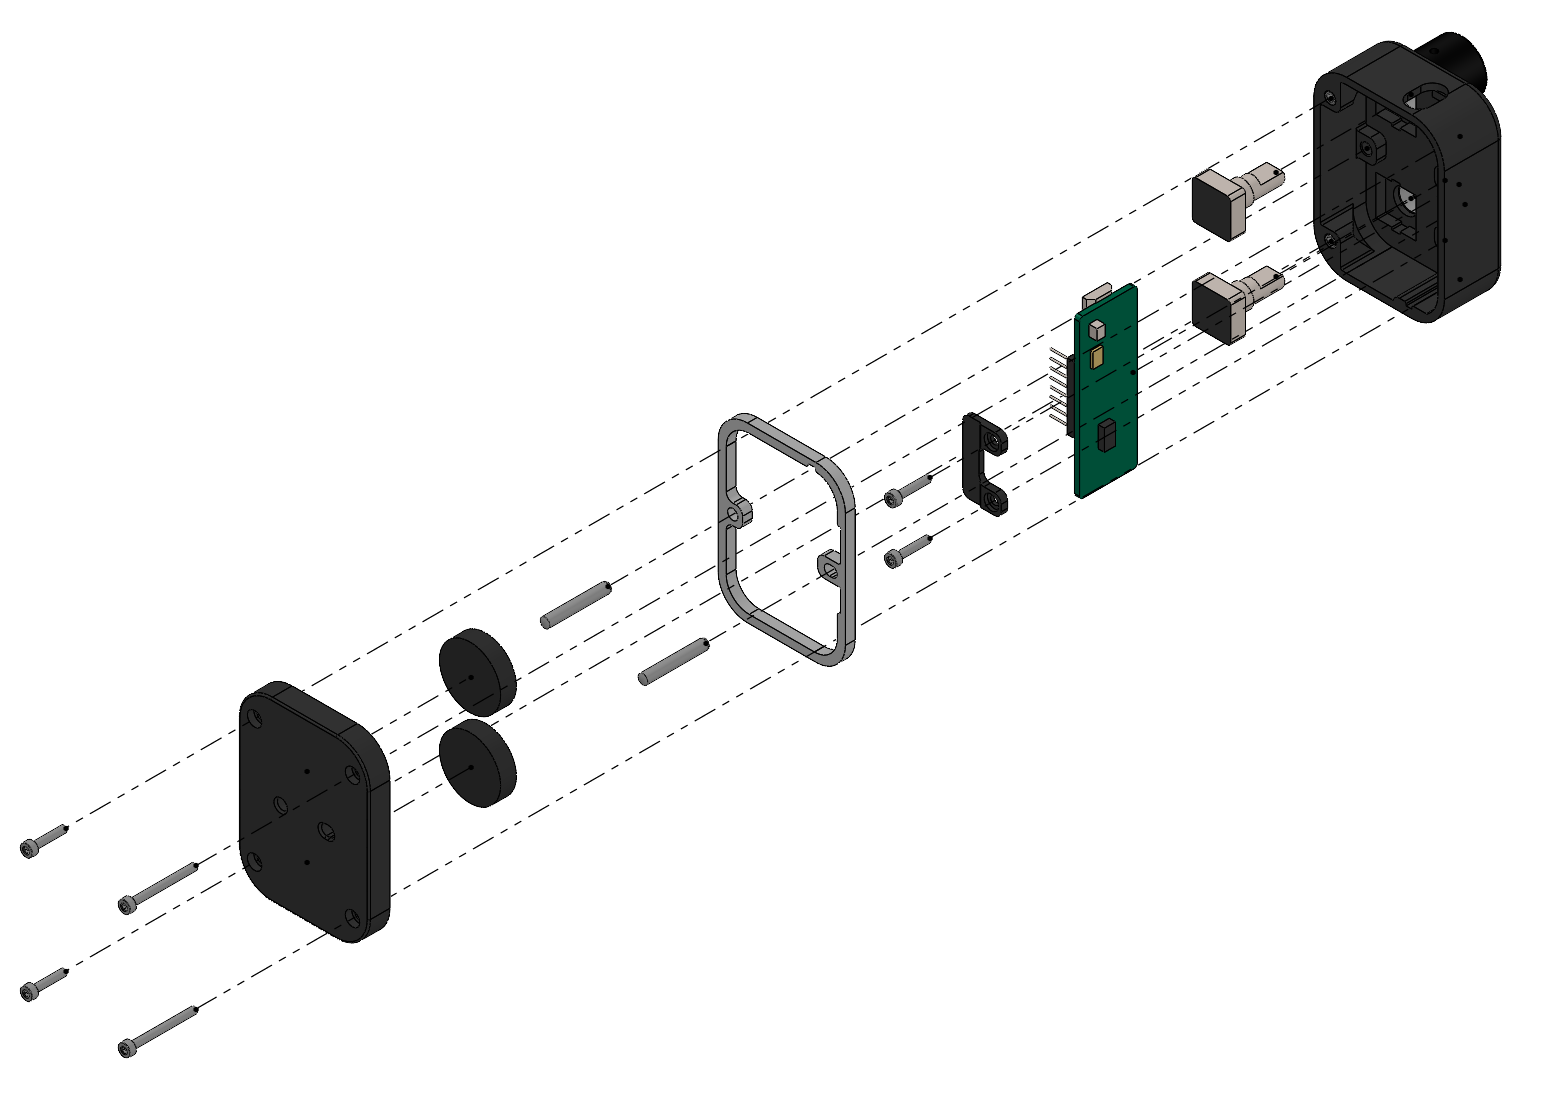
An exploded view of the CAD
The mechanical design prioritized a compact footprint, while sticking with a modern aesthetic. I modeled the entire macropad in SolidWorks, also recreating the Arduino Micro, rotary encoders, and knobs. The Arduino is attached using a clamp that secures it in a slot in the front of the macropad.
Heat set inserts were implemented for all screws, and internal pins were added for exact constraint. In the macropad, the magnets were placed as close to the mounting bracket as possible, leaving only room for a thin wall to separate the two.
To attach the bracket to the monitor, I prototyped a curved plate that uses double-sided tape to stick to the monitor. This plate then incorporates a wedge feature that allows the main macropad mounting bracket to attach. I decided to do this, so when needing to transport my monitor in the future, the plate can stay attached to the monitor, and I can easily detach everything else.
The macropad with the attached monitor bracket
Electronics
For the microcontroller, I selected the Arduino Micro for its small footprint and USB HID support. Two Bourns encoders with detents were chosen for the tactile feel when spinning the knob.
The following circuit was used to connect the two rotary encoders with the Arduino Micro.
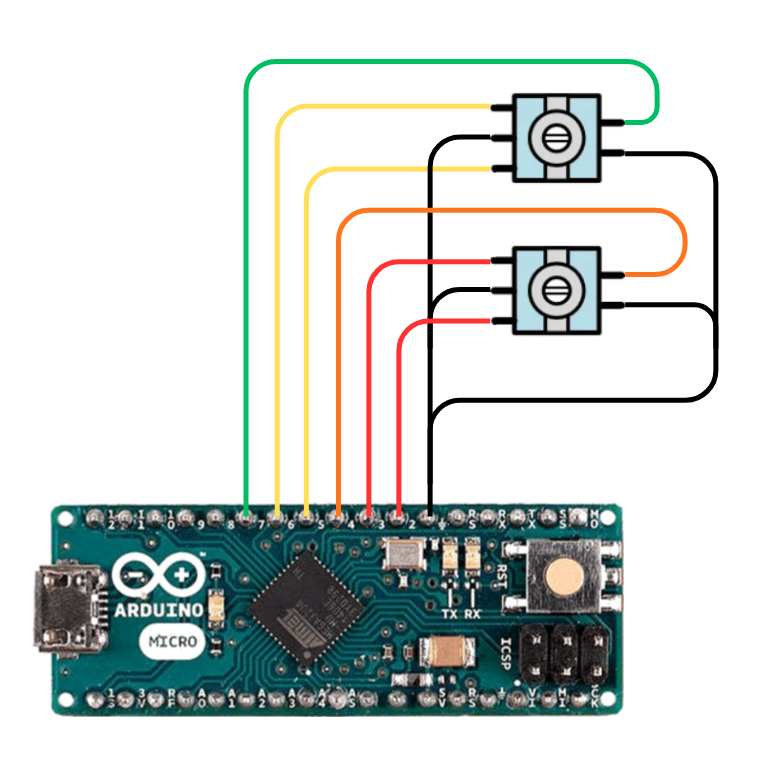
The electrical circuit for the macropad
When programming the Arduino microcontroller, I decided the create two “Modes” that would increase the functionality of the macropad. To swap between the two modes, I decided the interaction would be to hold down both encoders for 1s. To indicate a change of mode, the volume is quickly muted and unmuted, giving a visual indicator on the screen to the user. The functions of each mode are described below:
Mode 1: Volume/Media Control
- Encoder 1:
- Rotate: Volume Up/Down
- Single Click: Mute
- Double Click: Previous Track
- Encoder 2:
- Rotate: Left/Right Arrow Keys
- Single Click: Pause/Play
- Double Click: Next Track
Mode 2: Arrow Keys
- Encoder 1:
- Rotate: Up/Down Arrow Keys
- Encoder 2:
- Rotate: Left/Right Arrow Keys
Mode 2 enables me to use arrow keys when using my smaller form factor 60% keyboard, where these keys are missing.
Results
The macropad successfully allows for volume and media control and works in both monitor and desk modes. This project combined mechanical design, electronics, and programming into a functional peripheral that helps expand my skillset past solely mechanical projects.
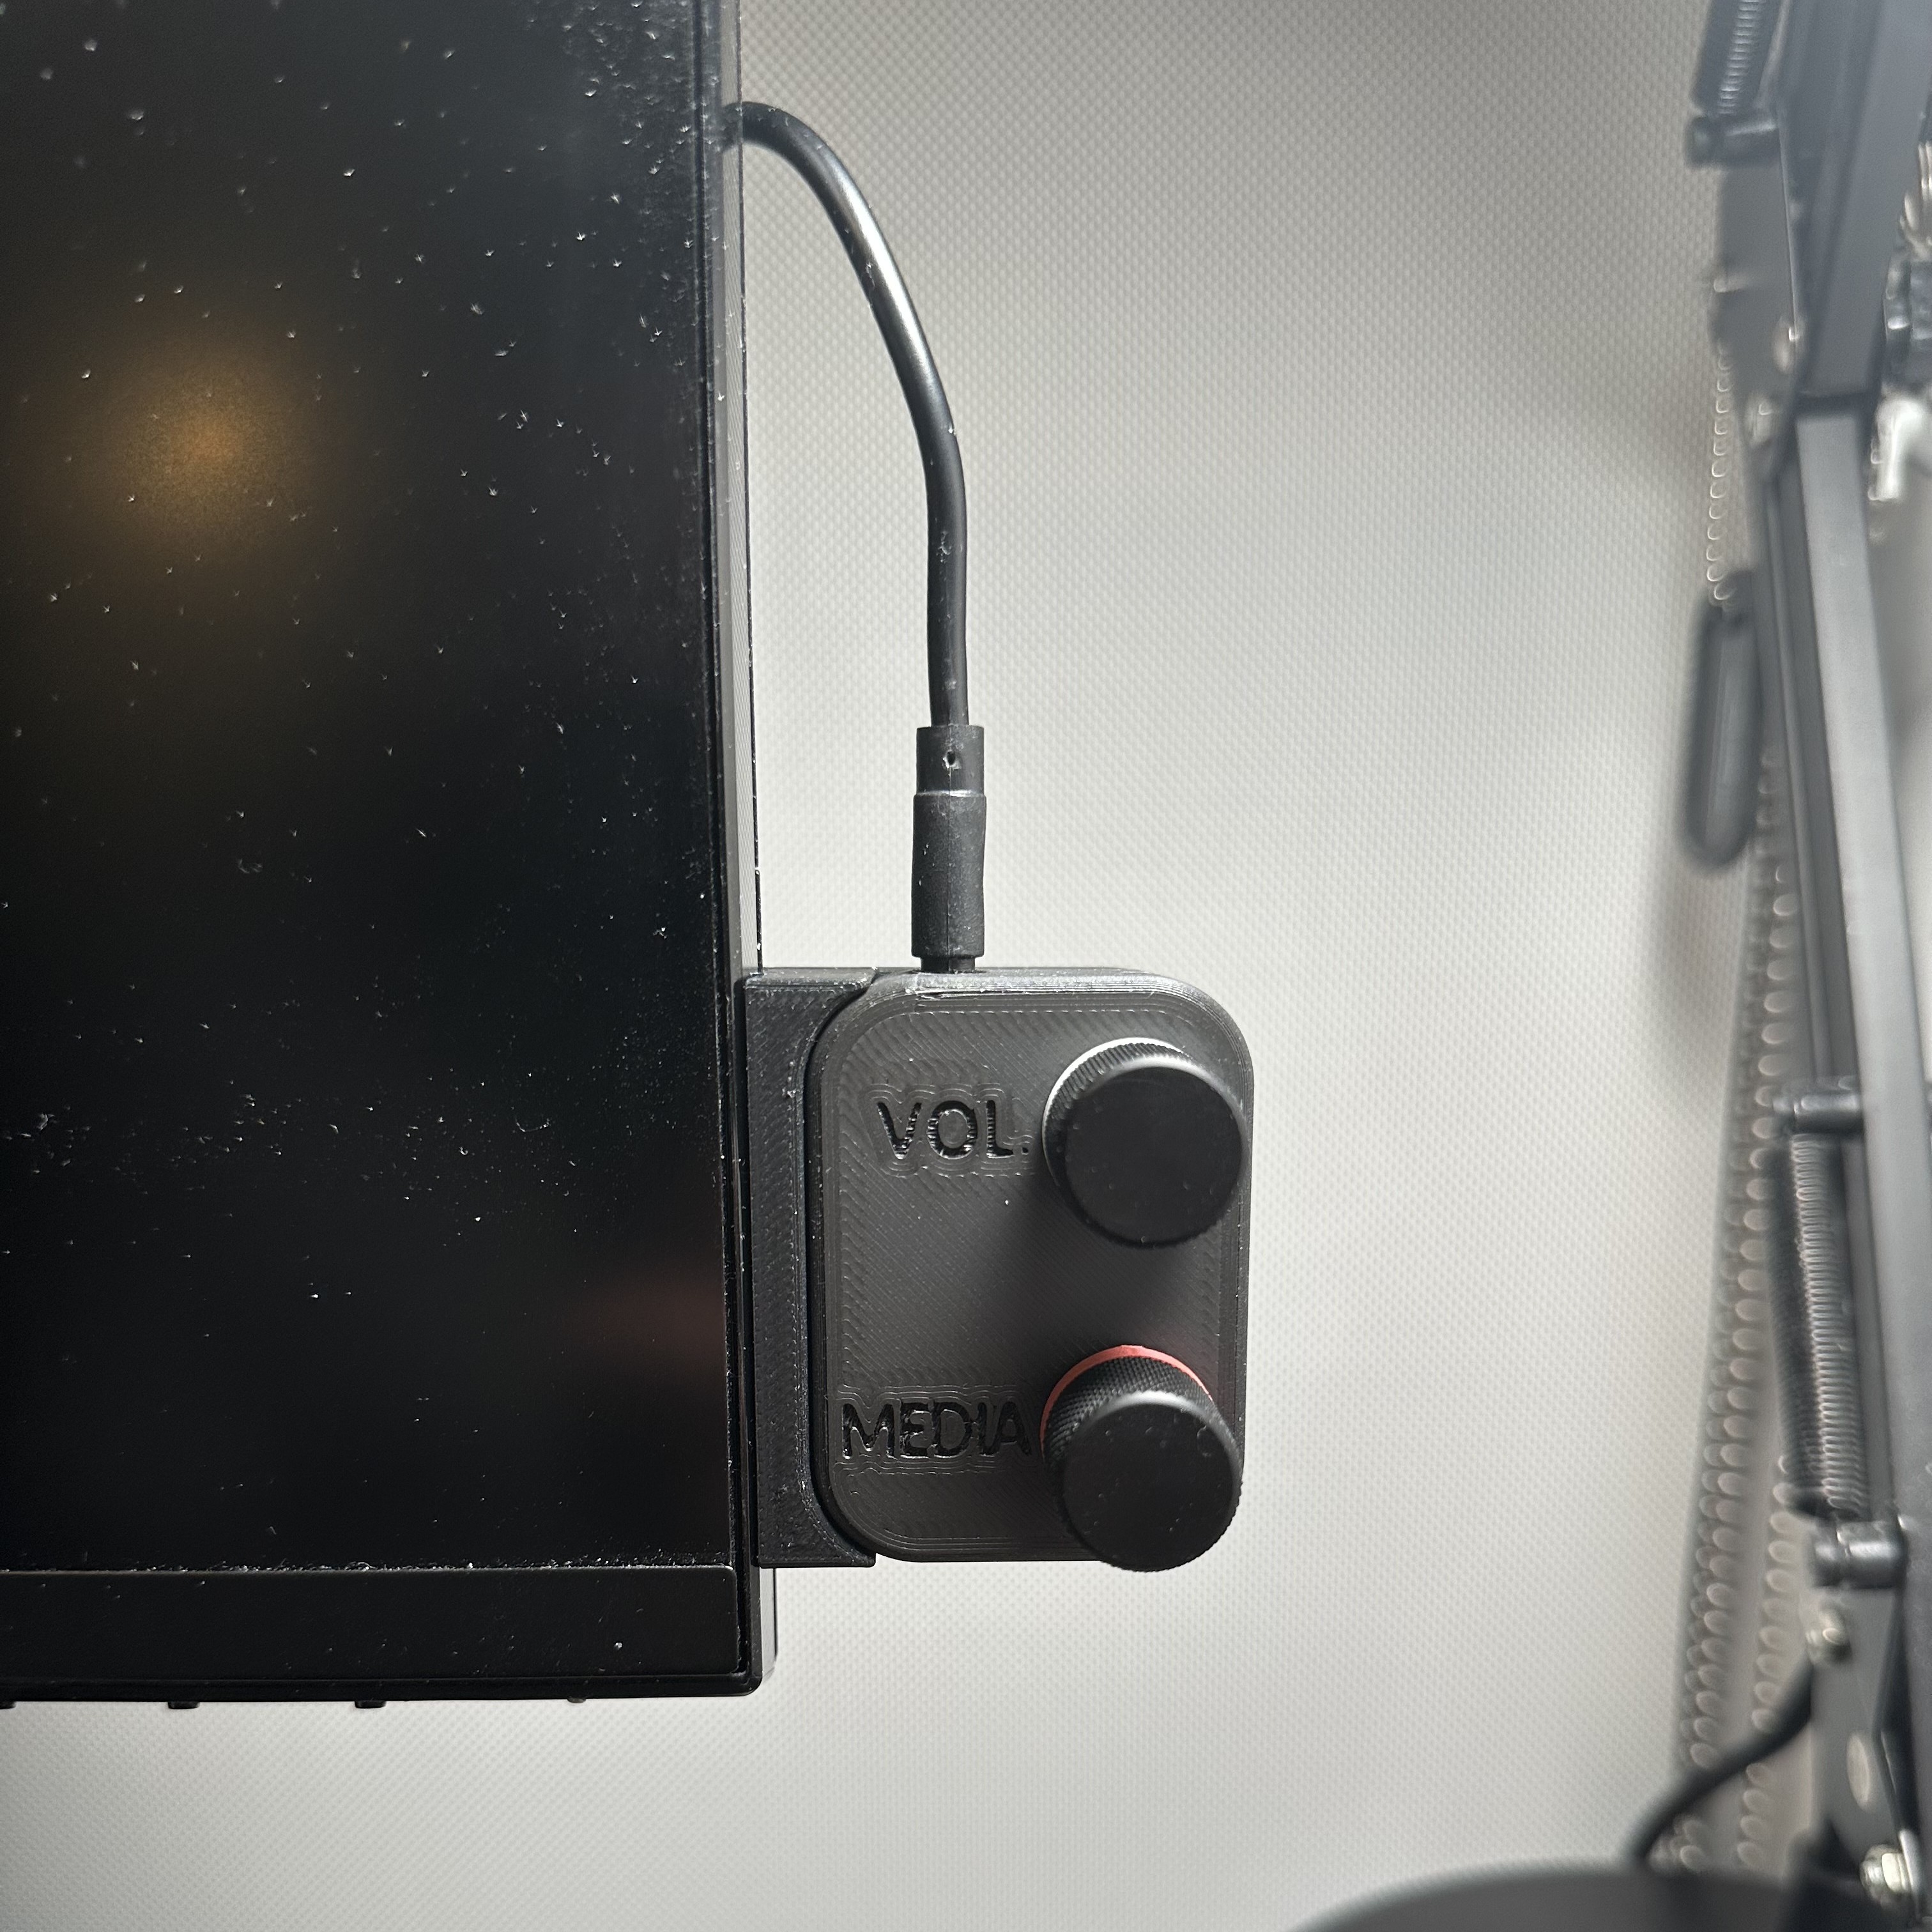
The macropad attached to my monitor
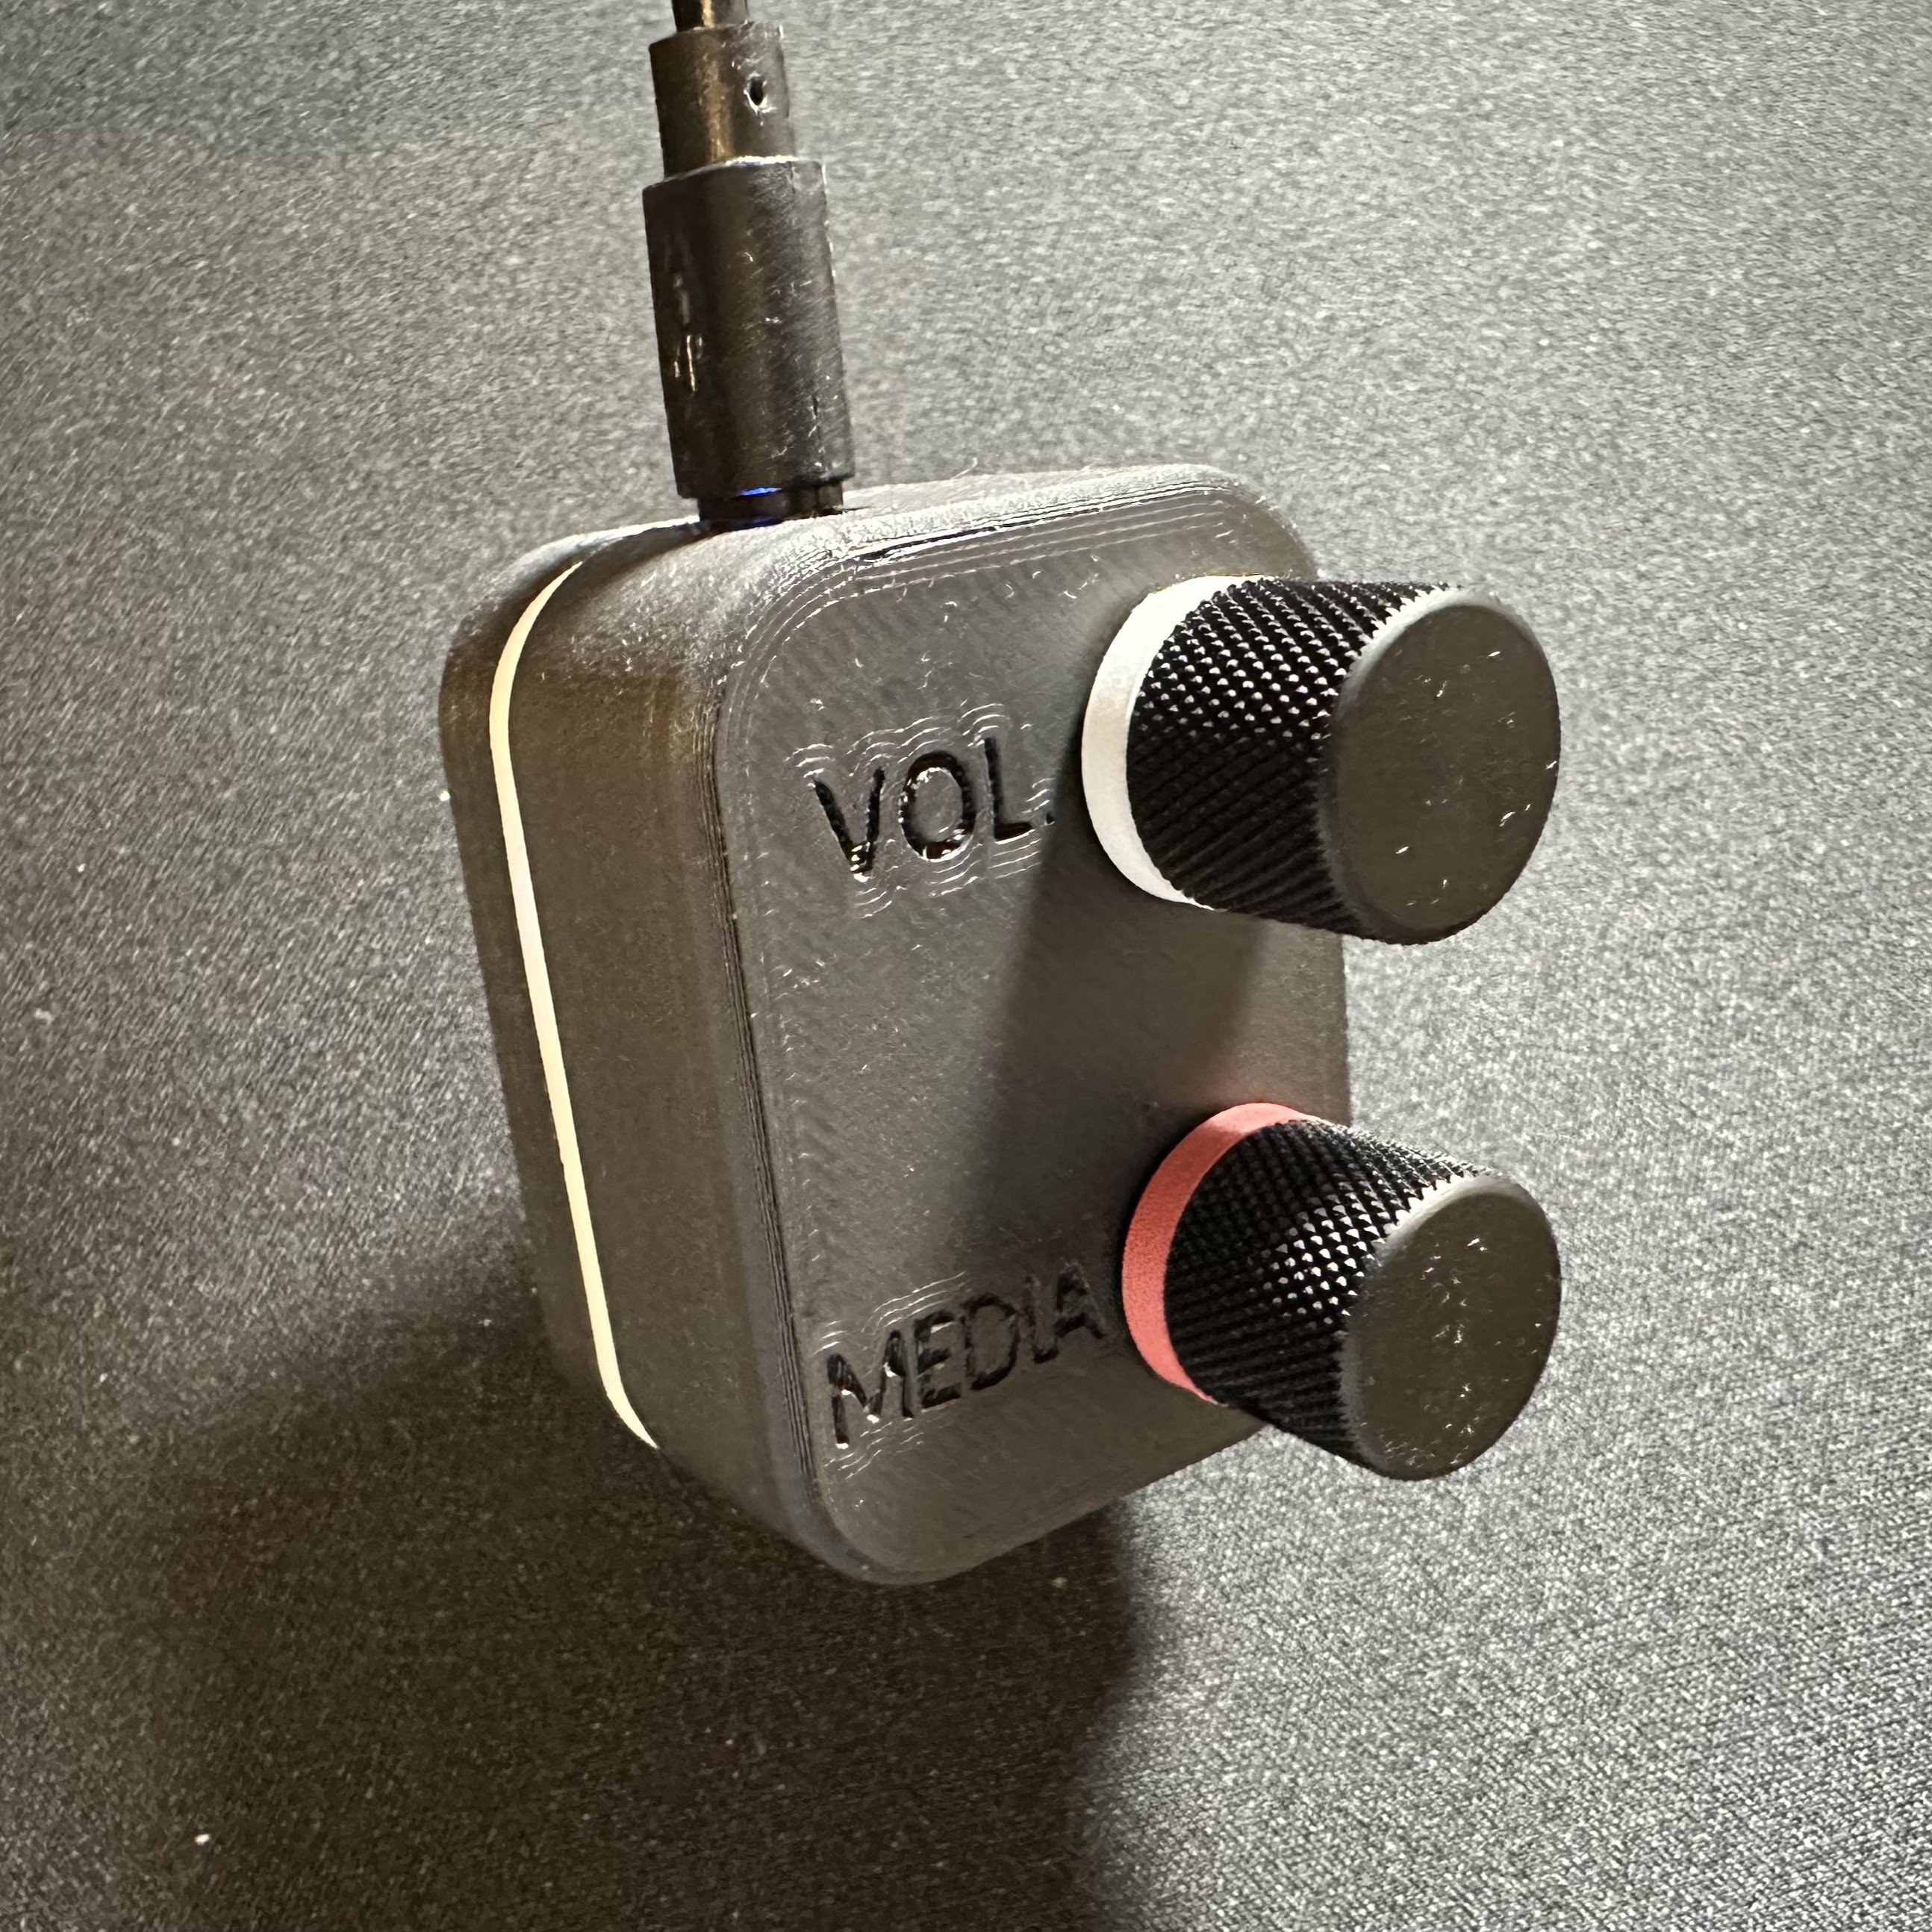
The macropad on my desk
Skills Applied
- Mechanical Design
- SolidWorks (configurations, assemblies, exploded views)
- 3D Printing
- Arduino Circuitry and Programming
- Hardware Sourcing
- Design for Manufacturing
- Exact Constraint